The trend for compact devices recording images while driving reached Poland from the eastern border about 10 years ago. Over this period, various models have emerged on the market - from the cheapest car cameras available in hypermarkets for less than 50 zlotys, to advanced devices priced in the thousands. Such a wide range ensures that many drivers opt for these devices; however, a significant portion of them installs them incorrectly. In our article, we will try to convey the knowledge on how to properly install a car video recorder to ensure correct area recording in front of the vehicle.
In this article, we will discuss:
- Where to mount the front car camera in a vehicle
- Proper alignment of the car video recorder lens
- How to correctly route the power cable of the driving recorder in a vehicle
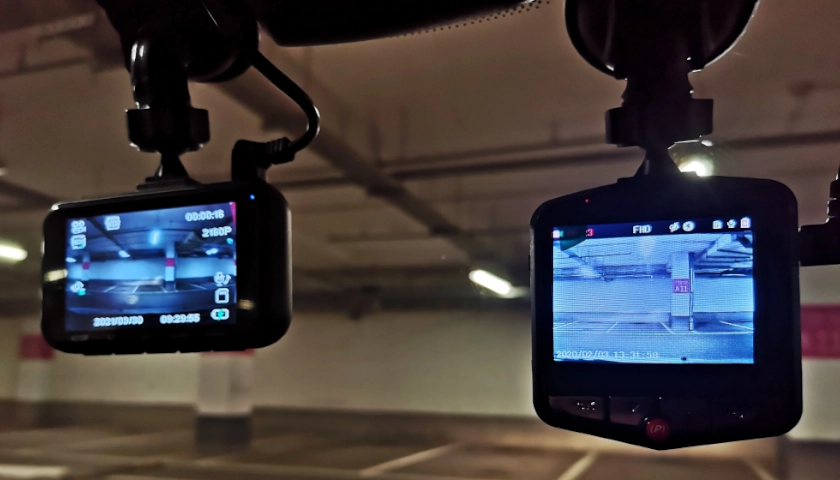
Where should the front car camera be mounted in a vehicle?
The primary role of a car camera is to serve as an independent witness during crisis situations – for this reason, almost all devices currently available on the market have a series of conveniences that make the device’s operation maintenance-free, such as automatic power on and off, motion detection, etc. As a result, the camera doesn’t need to be placed within the driver’s easy reach. However, to ensure our camera captures the entire area in front of the vehicle, it is essential to focus on its proper placement.
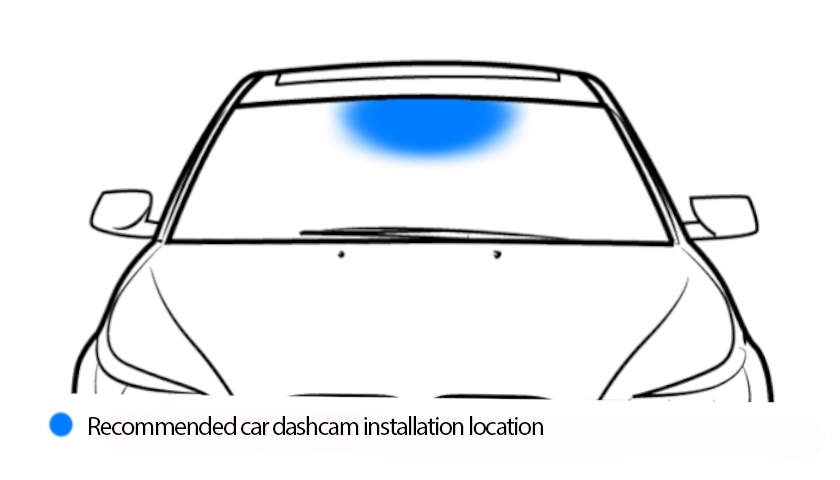
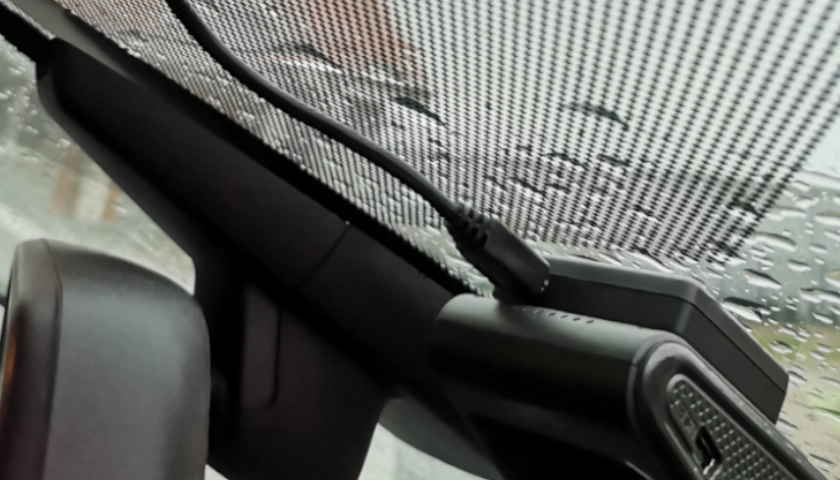
As can be seen in the above graphic, the most convenient place to mount the camera is the top center of the vehicle’s front windshield, near the rearview mirror. Such camera placement is recommended for two reasons.
Firstly, a camera hidden behind the rearview mirror is not conspicuous, both for the driver, who might have a significant portion of their view obstructed, and for bystanders outside the car. The second reason concerns the area the camera can capture – almost all devices have a wide-angle lens, so placing the camera in the corner of the windshield or near the bottom by the dashboard might result in a perspective that can’t capture essential details, such as the license plate of the vehicle in front of us.
Most modern cars now have additional sensors near the rearview mirror, making it impossible to mount the camera directly beneath it. In such cases, depending on the size of the device, it’s best to place the camera to one side of the built-in sensors, still trying to position it as close to the center as possible, while ensuring that the built-in sensors don’t obstruct the view.
Proper alignment of the car video recorder lens
In this part of the post, we will address the issue of setting the camera lens so that the recordings are as clear and helpful as possible in crisis situations.
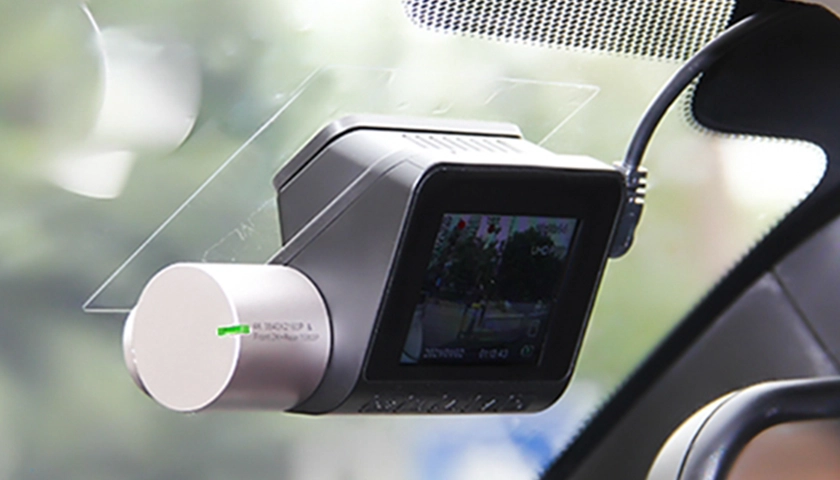
If we’ve already found the optimal place in our car to mount the video recorder, it’s worth doing a dry run by temporarily fitting the device to the windshield along with all the mounts. This allows for precise adjustment and maneuvering of the camera. While this isn’t a problem for cameras mounted with a suction cup, repeatedly repositioning cameras that are adhered to the windshield can damage the adhesive tape, making it necessary to replace it.
When positioning the camera horizontally (left-right), ensure that no internal elements of the vehicle interfere with the lens’s field of view. If the camera has a wide enough viewing angle to cover the car’s pillars, set the lens so that their visibility on both sides of the image is equal and the center of our vehicle in the lens is roughly in the middle of the image. If the car is equipped with built-in sensors around the rearview mirror and there’s a risk they will obstruct the view, move the camera slightly away from the sensor housing and reposition the lens following the previous guidelines.
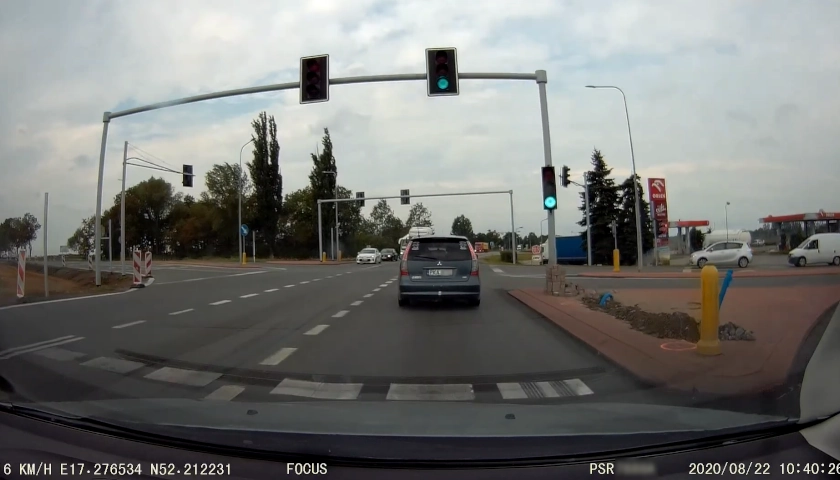
When aligning the lens on the vertical axis (up-down), two lines can be defined – the horizon and the visibility of vehicle elements. These lines may have a slightly different course for different viewing angles of the lenses used in a given camera model. The photo below shows an example of the line progression on a camera with a 160-degree viewing angle lens.
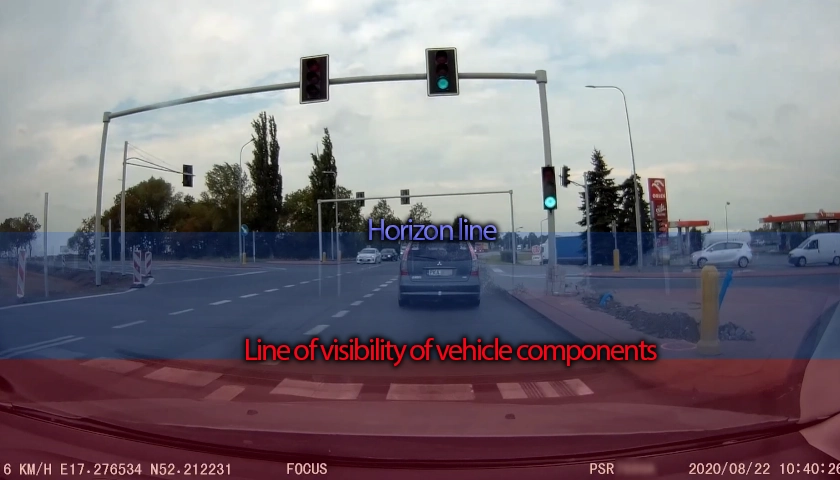
The horizon line should run roughly in the middle of the image and from the point of setting the camera vertically, it is the most important line. The area below it will cover what is directly in front of our vehicle, placing, for example, other road users in a place where there is no so-called “fish-eye” effect in wide-angle lenses. The space above this line will, for example, serve to capture traffic lights placed above the road by the lens. This way, the camera can provide excellent evidence whether the vehicle ran a red light, even being a few meters away from the signal post.
The line indicating the visibility of vehicle elements, on the other hand, defines the area where visible parts of our car, such as the hood, dashboard, etc., can be located. They serve as reference points when analyzing recordings and allow for a better assessment of, for example, the distance of our car from the one in front. It’s also an excellent buffer for all inscriptions superimposed on recordings by the dashcam. The software of cameras in most cases places timestamps along with GPS data at the bottom of the screen, making it possible for them to be on less crucial parts of the recording. Care should be taken, however, not to overdo it and ensure that these elements do not occupy more than about 1/4 of the image height. Too much of the dashboard in the recording can effectively distort the image in front of the car, placing it in the area where the so-called “fish-eye” effect occurs.
It’s important to remember that there are as many optimal lens settings as there are cameras on the market. The lens angle plays a significant role here – the most popular cameras on the market have viewing angles of 140 and 160 degrees, but you can also find devices with angles of 120, 130, or 170 degrees. Another crucial factor is the mount design – there are cameras with a ball joint, which offers a high range of motion. Still, a significant portion of the market consists of cameras with gear mounts, where tilt angles are adjusted incrementally. Often, one can also come across devices mounted directly to the windshield, having only a two-axis lens adjustment.
Did you know...
- The origins of dashcams date back to the 1980s. The first car cameras were used by police services to record interactions with drivers during traffic stops.
- Mounting a camera on the front windshield can affect the driver's field of vision. Therefore, it's important that cameras are mounted in a location that minimizes obstructions and doesn't block the view.
- Some car cameras use suction cups, while others have permanent mounts or are attached using special adhesive tapes. The choice of mounting method depends on the camera model and the user's preference.
- Mounting a camera in the wrong place may violate traffic regulations in some countries. It's always worth checking local laws before installing a camera.
- Adjusting the camera angle is crucial. A camera pointed too low may not capture the faces of other drivers or license plates, while a camera pointed too high might record an unnecessary amount of the sky.
How to properly route the power cable of a dashcam in a vehicle?
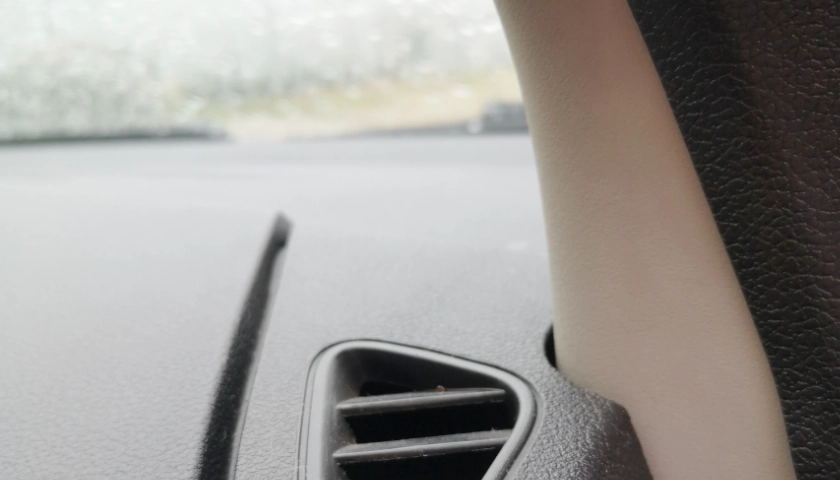
Once you’ve properly chosen a spot to mount your camera on the front windshield and adjusted its lens to cover the entire area in front of the vehicle, the only thing left is to connect the power cable to our dashcam and route it in a way that it doesn’t interfere with or detract from the aesthetics of our car’s interior. Walking through a parking lot, one can see many cars that already have a dashcam installed. Unfortunately, a significant portion of them, even after correctly mounting the device, have carelessly dangling power cables running the full height of the interior straight into the cigarette lighter socket. Such practices are not only bothersome but also dangerous. Firstly, a hanging cable restricts visibility through the front windshield. Secondly, placing the wire in this manner can significantly obstruct movements behind the wheel – shifting gears or the need to make a sudden maneuver could result in snagging the cable and losing control on the road. Thirdly, a well-secured cable can protect the camera from damage – during exceptionally high or low temperatures, a suction cup or adhesive mount might detach from the windshield. If the cable is additionally secured in the vehicle, it can stop the camera from falling, thus protecting it and the car’s interior from damage.
Car camera manufacturers include power supplies with cables about 3 meters long in the set, which is entirely sufficient for cleverly hiding the cable inside the car. Below, we will show examples of camera wiring installation in the interior of a popular second-generation Ford Focus. However, it’s important to remember that as many different car models as there are, there will be an equivalent number of optimal installation solutions.
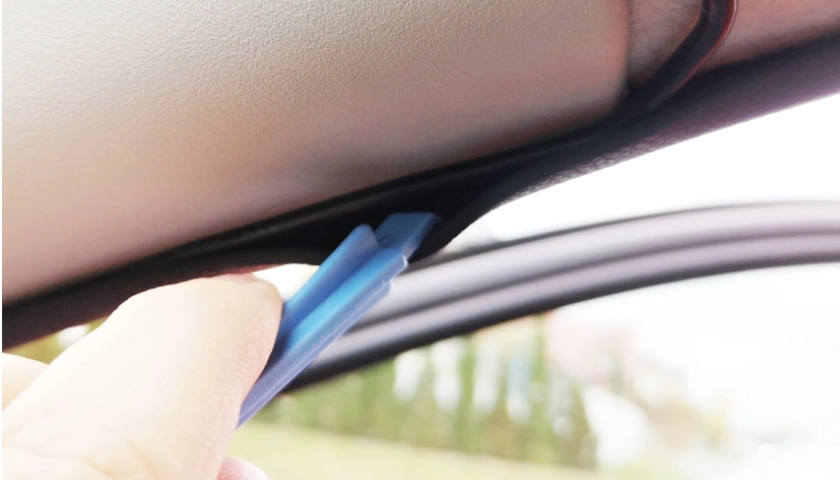
Starting from the camera, it’s best to hide the cable in the gap between the front windshield and the headliner. It’s worth noting that even in new premium-class cars, it’s possible to pry the upholstery elements in such a way to hide a thin USB cable underneath them. Also, remember to leave the cable slightly loose leading to the camera’s power socket, so it’s not too taut.
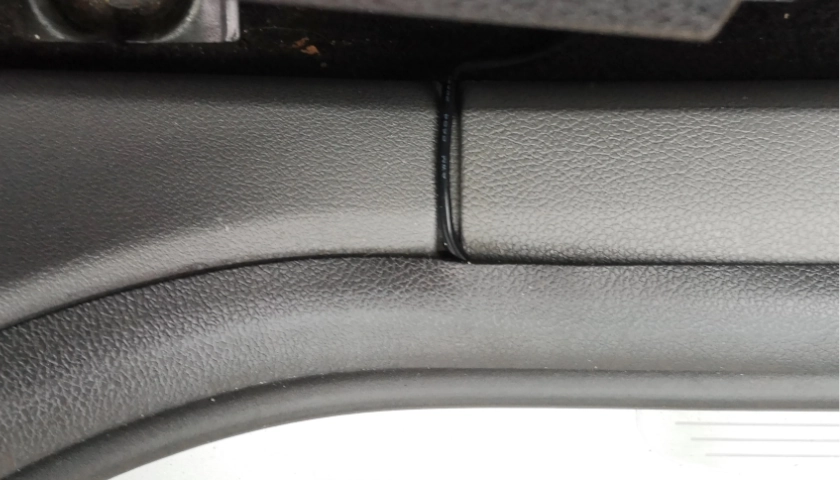
Next, you should lead the cable towards the passenger side until you reach the edge of the window. At this point, the placement of the power socket in the car will determine the next step. In some cars, it will be best to continue routing the cable along the right edge of the window, while in others, a more convenient solution is to place it between the headliner and the front pillar cover, and then under the seal of the passenger’s front door. You don’t have to worry about the cable getting damp or distorting the seal – the cable is thin enough to easily fit under the seal, and at the same time has a thick enough wire cover that it will not be susceptible to atmospheric conditions.
Next, the camera’s power cable can be placed under the dashboard on the passenger’s side or pulled a bit further towards the front passenger seat and pulled out behind it. In such an arrangement, it’s advisable to place the cable as deep as possible, additionally covering it with a foot mat to prevent any passengers from accidentally pulling it out. It’s also important to ensure the cable is placed under the tracks of the front seat so that it doesn’t accidentally get cut during seat adjustments. This is also a good spot to hide any excess cable if there is any left.
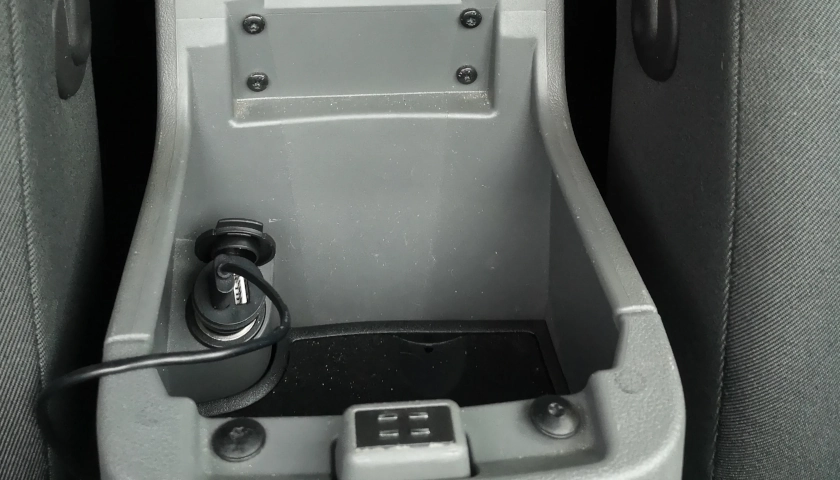
The final step is to route the end of the cable with the charger to the cigarette lighter socket. The camera automatically turns on and off when power is supplied to the cigarette lighter socket, so it’s a good idea to use sockets that are hidden away in the car – in compartments under the armrest or by using the rear passenger cigarette lighter socket.
Let’s emphasize this once again – in every car, the way of routing the cable might differ slightly or significantly, so before installing, it’s a good idea to look around and determine which route to the cigarette lighter socket will be most convenient and allow for the best cable concealment. Fortunately, car manufacturers are increasingly accommodating this, providing indentations in dashboards and upholstery elements, which are almost perfectly suited for routing additional wiring.
Summary
Although installing a dashcam may seem straightforward, it requires consideration of many factors – from choosing the optimal location, proper angle setting, to correctly routing the power cable.
In the digital age we live in, dash cams are becoming increasingly technologically advanced, offering a range of functions and features. Nevertheless, the basic principles of their installation remain the same. Proper placement and setup are key to achieving optimal recording quality and maximizing the benefits of having a dashcam in the vehicle.
In our online store HDWR, you will find a wide range of dash cams with various functions and image resolutions. We warmly invite you to explore these useful devices.
![High-level security and control – Access Control Systems [2024]](https://hdwrglobal.b-cdn.net/wp-content/uploads/2024/05/transparent-thegem-product-justified-landscape-s.png)